


- Conditions to avoid
- Maintenance and care with pH electrodes \ Reference \ ORP \ Conductivity
- PH Electrode Cleaning \ reference
- ORP Electrode Cleaning
- Conductivity Cell Cleaning
Conditions to avoid
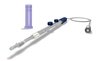
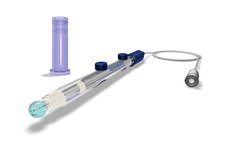
Whenever you remove the bottle with the storage solution from your sensor, completely unscrew the cap from it;
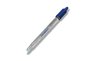
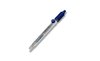
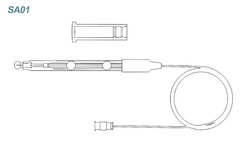
Be very careful when handling your analytical sensor, it is made of glass and has parts, such as the bulb, that are very sensitive to mechanical action. A tap on the bottom of a Becker glass, for example, is enough to damage the piece;
Never scrape or sand the glass surface (bulb) of the electrode;
Do not leave your sensor (pH, ORP or conductivity) out of the storage solution for more than 6 hours. This procedure may compromise the response speed of the part or even render it unusable;
Never store your pH or ORP sensor in deionized water. Respect the storage solution recommendation for the type of pH sensor, reference and ORP; Only conductivity cells should be stored in deionized water;
Inlays on the glass surface (bulb) or in its reference system (ceramic junctions), will prevent a correct reading;
Avoid extreme conditions, whenever possible, and be aware of the specific usage limitations of each sensor model you are using. Elevated temperatures, as well as constant measurements of strong acids or caustic solutions, shorten the sensor's service life;
Never expose the electrode to temperatures below -12 ºC.
Maintenance and care with pH electrodes \ Reference \ ORP \ Conductivity (Back to top)
Analytical sensors in general need periodic maintenance to ensure the quality of their readings and extend their useful life.
Maintaining the electrode, whenever out of use, immersed in the packaging solution is the main one. Following are indications:
- PH, reference or ORP sensors with internal electrolyte of KCl 3 mol / AgCl - packaging solution KCL 3 mol (SSE02).
- PH or reference sensors with internal KNO³ electrolyte - KNO³ conditioning solution (SSE05).
- PH sensors for alcohol, with internal LiCl 2mol electrolyte. - 2 mol LiCl conditioning solution in ethanol (SSE01).
- Conductivity cells, for all constants - use deionized water.
Keep the level of the internal electrolyte always close to the filling hole.
Shielded sensors do not need to fill the internal electrolyte.
Always use the internal electrolyte, recommended by the manufacturer.
After use, wash the sensor with deionized water to remove possible deposits that may be deposited on it.
Remove the internal electrolyte, whenever the sensor has a slope of less than 95%, or when used in very aggressive or contaminated systems.
PH Electrode Cleaning \ reference (Back to top)
- Salt deposit : dissolve the deposits by immersing the electrode in clean water for 10 to 15 minutes.
- Oils and greases: carefully wash the electrode bulb with neutral pH biodegradable detergent and water until all fat is removed.
- Reference junction clogged by salt drying: heat a 3 mol KCL solution (SSE02). up to a maximum of 50ºC and keep the sensor immersed for up to 10 minutes. Allow the electrode to cool naturally.
- Contaminated reference junction: use Thioureia solution (SSL02). Leave the electrode immersed in the solution for 30 minutes.
- Protein deposits: use Pepsin solution (SSL01). Leave the electrode in the solution for a maximum of 5 to 10 minutes.
Slope less than 95%: for “rechargeable” electrodes - Remove the internal electrolyte through the refill hole, using a syringe. Rinse the part internally with deionized water 3 times. With the internal reference system clean, fill the sensor with a new internal electrolyte (SSE01, SSE02 or SSE05). This procedure must also be repeated 3 times before use.
After each of the procedures indicated above, rinse the piece with plenty of deionized water, dry it carefully using absorbent paper towels and let the electrode rest in its packaging solution for 24 hours.
The above procedures may not be sufficient to restore the measurement quality of a sensor and such inefficiency is not considered a defect that can be guaranteed.
ORP Electrode Cleaning
- ORP electrode bulb (metal rod): can be gently cleaned with damp paper, dry silicone or carbide, ferric oxide, emery cloth, iron oxide or very fine metal fiber wool.
- Salt deposit : dissolve the deposits by immersing the electrode in clean water for 10 to 15 minutes.
- Oils and greases: carefully wash the electrode bulb with neutral pH biodegradable detergent and water until all fat is removed.
- Reference junction clogged by salt drying: heat a 3 mol KCL solution (SSE02). Up to a maximum of 50ºC and keep the sensor immersed for up to 10 minutes. Allow the electrode to cool naturally.
- Contaminated reference junction: use Thioureia solution (SSL02). Leave the electrode immersed in the solution for 30 minutes.
- Deviation above + 15mV: for “rechargeable” electrodes - Remove the internal electrolyte through the recharging hole, using a syringe. Rinse the part internally with deionized water 3 times. With the internal reference system clean, fill the sensor with a new internal electrolyte (SSE01). This procedure must also be repeated 3 times before use.
After each of the procedures indicated above, rinse the piece with plenty of deionized water, dry it carefully using absorbent paper towels and let the electrode rest in its packaging solution for 24 hours.
The above procedures may not be sufficient to restore the measurement quality of a sensor and such inefficiency is not considered a defect that can be guaranteed.
Conductivity Cell Cleaning
Deionized water or neutral biodegradable detergents can be used.
For more specific cleaning, a mixture of one part by volume of isopropyl alcohol, one part of ethyl ether and one part of 0.1 mol HCL can be used. After cleaning, rinse the cell thoroughly with deionized water.
More stringent procedures provide for the removal of the platinum black film, with the application of royal water to the electrode, or electrolysis in HCL.
For cells without or without platinum black, a new platinization is necessary.
Platinuming procedure:
- Platinization solution: dissolve 1.0 g of chloroplatinic acid PA (H2PtCl6 * 6H2O) and 0.012 g of lead acetate PA (CH³COO²), in 100 ml of deionized water. This solution can be reused several times.
- Dip the conductivity cell in this solution and connect one wire to the negative pole and the other to the positive pole of a 1.5 V dry cell. Keep immersed until one of the platinum plates is completely platinum. Invert the poles and perform the procedure again. Rinse the electrodes with deionized water.
After each of the above procedures, rinse the piece with plenty of deionized water, dry it carefully using absorbent paper towels.
The above procedures may not be sufficient to restore the measurement quality of a sensor and such inefficiency is not considered a defect that can be guaranteed.